|
April 14, 2011 - Spring Flower Cake
Click here for short instructions
Here in Boston, we're finally starting to see some green leaves and smell some flowers. It seemed like a perfect time of year to celebrate the change of seasons with a flower cake. I thought that some of our younger bakers could also partake in making this type of cake for Mother's Day, which is just around the corner. Now, a bit of a disclaimer. When my sister asked me to describe what kind of flower I modeled the cake after, I replied that it was like the one that I used to draw when I was five years old. She understood. I assume that most of you readers will be far more advanced than I in the field of botany, and your flower cake will benefit from that. Nevertheless, hopefully the description and pictures below provide a starting point for your project!
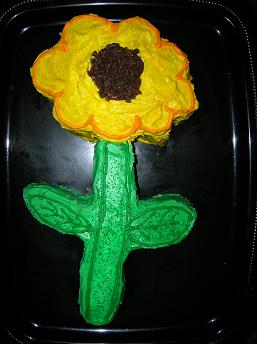
To make this cake, you'll need a Cake-Shaping Strip (look here about how to make one), a sheet pan, prepared cake batter (from about 1 box of cake mix), icing (about 1 16-oz. white-icing container and part of a 16-oz. chocolate-icing container) and possibly some mini chocolate chips. Here's a picture of the finished product.
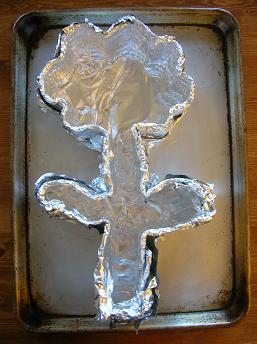
First, make a Cake-Shaping Strip as described here using six or seven sushi-mat segments. (I used six segments, though I would have made bigger leaves had I used seven.) Line a cookie sheet with a large piece of heavy-duty aluminum foil. Shape the Cake-Shaping Strip into the outline of a flower. Fold the foil around the edges of the strips. Because the flower has so many corners and turns, I'd recommend using a few extra strips of foil to wrap around select regions. For example, use a small strip of foil to put under and wrap around the sides of the two stem portions. Also, take small pieces of foil (about 3-inches square), crumple it up into small wads and stick them in areas where the foil could not wrap around the strip very well.
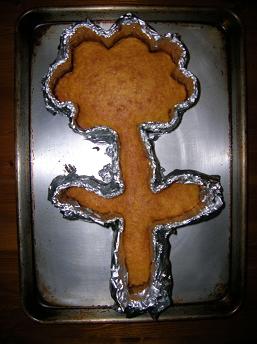
Spray the strip and the foil with cooking spray, heat the oven to 350 degrees, and make a cake batter. Batter made from one box of cake mix was plenty for the cake that I made. Kudos to anyone making homemade batter. Pour the batter in, and bake until the cake is done.
Cut away any cake batter that leaked through the surrounding foil sheet/s, and then gently unwrap the sheet/s of foil from the strip. Now cut away any cake batter that leaked through the strip, and gently separate the strip from the cake. You can position a table knife between the cake and strip to aid in this process, if helpful.
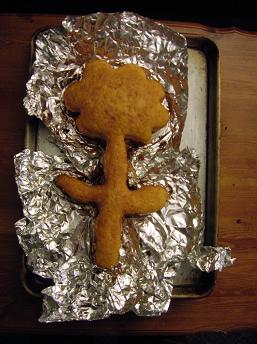
Use a couple of large spatulas to gently lift the cake onto your serving plate. If you can get an extra set of hands, that's very helpful. Coordinated movement.
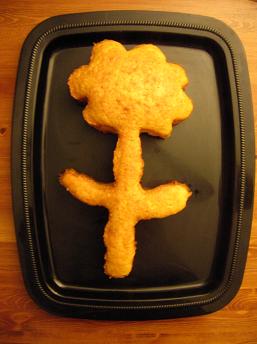
Decorating time! I divided a single container of icing in two - dying half of it green and half yellow. I applied the green icing along the stem and leaf portions as smoothly as possible. For the petal portion, I applied a thick layer of the yellow icing, gently pressed my icing spatula (or a knife would work) into the top of the layer and pulled up. That created a wavy look. I had some yellow and green sugar sprinkles, so I sprinkled those on the respective parts of the cake. I also took some of the remaining yellow and green icing, and added some more dye to give it a darker color. I then piped outlines along the flower, stem and leaves portions. Finally, I frosted the center of the flower with chocolate icing and topped it with mini chocolate chips. Spring time - here we come!

|