|
June 1, 2011 - Father's Day Blue-Ribbon Cake
Click here for short instructions
Father's Day is just around the corner - June 19. Two weeks away. I was trying to think of a generic cake that most fathers would love. I thought of tools and fishing, but that wasn't quite generic enough. For Mother's Day, I posted a heart cake, which every mom is sure to love. Finally, I came up with an equally affectionate cake: a blue-ribbon cake. Now there's a way to show Dad how much he means to you.
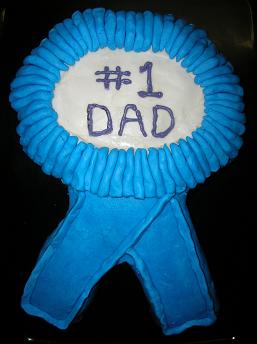
To make this cake, you'll need a Cake-Shaping Strip (look here about how to make one), a sheet pan, heavy-duty aluminum foil, prepared cake batter (from about 1 box of cake mix), 2 batches of Decorating Clay (look here about how to make this), food dye, and icing (about 1 1/2 16-oz. white-icing container).
First, make a Cake-Shaping Strip as described here using six sushi-mat segments. Line a sheet pan with aluminum foil, and shape the strip into a ribbon shape. Wrap the foil around the strip as best as you can, and add small foil balls in the areas having weaker foil coverage (e.g., between the ribbons and between the top and bottom portions). This time around I forgot to add the foil balls. When I poured the batter in, it started to leak through one of these poor-coverage areas. I found out that you can even add the foil balls at this point! Just gently push them in the weak areas until the batter stops leaking.
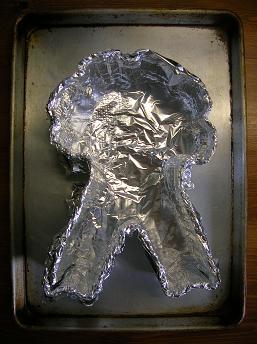
Spray the foil and the strip with cooking spray, and pour prepared cake batter (from about 1 box of cake mix) into your new pan. Bake until the cake is done. Cut away any "leaked" cake portions, and gently separate the strip from the cake.
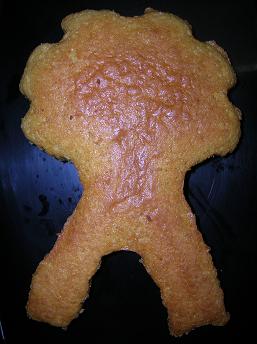
Now prepare your icing, fondant, or Decorating Clay. I used Decorating Clay. Make two batches of the Bright, Flavored Decorating Clay (look here about how to make this). But before adding blue food dye (or whatever color dye you decide to add), take a little (about 1/5 of the clay) out of the mixer.
Generously coat two pieces of vinyl mats with powdered sugar. Place the blue Decorating Clay between the mats and roll it out. Apply a medium-thick layer of icing on the cake. Gently remove the top mat, and flip the bottom mat (with the rolled out Decorating Clay) onto the cake. Remove the bottom mat. Lightly press the Decorating Clay into the sides of the cake, and cut away the excess Decorating Clay. (Save the excess - we'll use it soon.) Use a wet table knife to smooth out any bumps or tears.
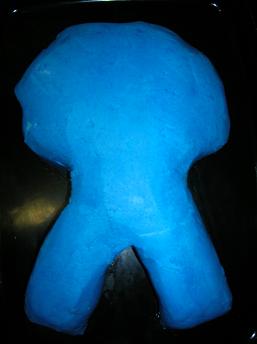
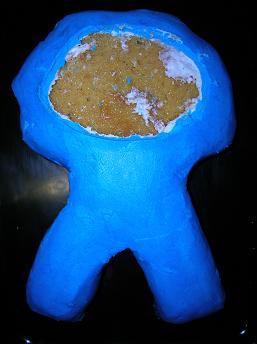
Cut out a center portion of the blue Decorating Clay, as shown below.
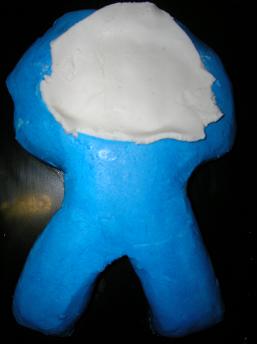
Roll out the white Decorating Clay using the same technique as described above. Cut out a portion of the white Decorating Clay slightly bigger than the hole in the cake's blue Decorating Clay layer. Place this white portion on the cake, as shown below.
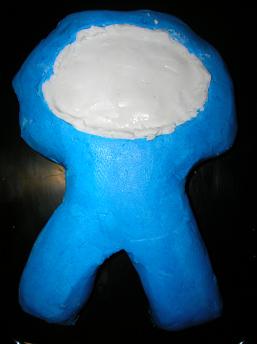
Cut the white portion to fit the hole, and gently press the edges of the white portion to be right next to the edges of the blue perimeter.
Using your extra blue Decorating Clay, form small rolls just slightly longer than your cake's blue perimeter. Arrange these rolls around the cake to create ribbon ruffles. Decorate the center white portion to flatter your dad.

|