|
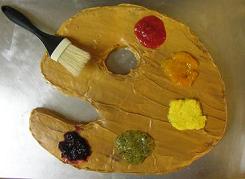
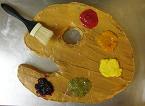
September 1, 2011 - Fruity Painter's Palette Cake
Click here for short instructions
We have a friend who's a great painter. (See some of her watercolor paintings.) Awhile back, I saw her studio and noted her painter's palette. We had them over for dinner, and I thought that it would be fun to celebrate her hobby. Not only would it be shaped as a painter's palette, but the "paints" would be made from fruits of different colors and the underlying cake would be filled with fruits of the same type. I'll tell you all about it, along with some shortcuts that you can use. But first the cake:
To make this cake, you'll need a Cake-Shaping Strip (look here about how to make one), three extra sushi-mat segments, heavy-duty aluminum foil, a sheet pan, prepared cake batter (see the fruit-at-the-bottom cake batter recipe below or use about 2 boxes of cake mix), icing (about 2 16-oz. containers of white icing and 1/2 a 16-oz. container of chocolate icing), and prepared or homemade jam for the "paints" (or just dye some more icing).
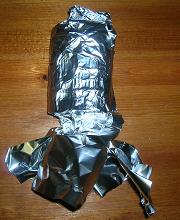
First, make a Cake-Shaping Strip as described here using six sushi-mat segments. Line a sheet pan with 1-2 sheets of aluminum foil (depending on your cake's width), and shape the strip into a shape of a painter's palette. Make sure to exaggerate any spatial features, as they'll seem smaller after you unwrap and ice the cake.
Wrap the bottom foil sheet around the strip, tearing it where needed to wrap it. Push small balls of foil along the bottom outer perimeter wherever you think that the batter might leak due (e.g., where you tore the foil). I'll show you my shape in just a minute.
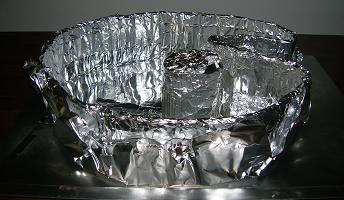
But first, my Internet searching informed me that most painter's palettes have a hole in them. I'm not quite sure what the hole's for - maybe to hold onto? Regardless, it's there, so we need to make that. Roll up several (e.g., three) sushi-mat segments (look here to see how to make sushi-mat segments). Make sure not to make this too small. I'd use at least three sushi-mat segments. Here's what that looks like:
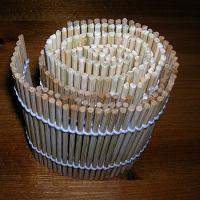
Then wrap the rolled sushi-mat segments in aluminum foil
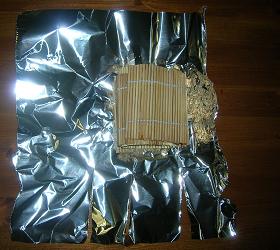
Crumple up the top of the wrapped foil just to get it out of the way. Make four tears in the bottom of the foil. The idea is that these flaps will help prevent cake batter from leaking into the hole.
Put the wrapped sushi mats where you'd like the palette's hole to be and press the flaps down.
Now make the cake batter. You can use about two boxes of cake mix, or you can make the cake batter below. This cake is so delicious, and it's low-fat, but I will warn you that it sticks to the foil and strips a little more than normal cake mix. (Maybe because it's low fat?) I'll try to show you how to deal with that. Whatever cake batter you make, after it's made, spray the strip and bottom foil layer with cooking spray, pour the batter into your cake pan, and bake it until the cake is done.
****
Fruit-on-the-Bottom Cake
2 cups flour
2 cups sugar
3 teaspoons baking powder
1/2 teaspoon salt
2/3 cup canola oil
2/3 cup fat-free vanilla yogurt
1 1/3 cups fat-free milk
4 cups chopped and peeled fruit
1/4 cup sugar
Put oven rack on highest rack. Preheat oven to 350 degrees. Spray a pan with cooking spray.
Mix flour, 2 cups sugar, baking powder and salt. Stir in milk. Mix in oil and yogurt. Pour into prepared pan. Top batter with fruit. Sprinkle 1/4 cup sugar over fruit.
Bake 50-60 minutes or until brown.
****
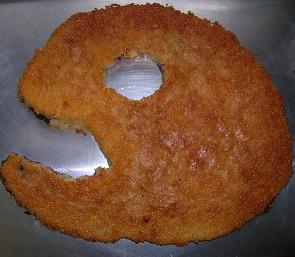
Here's how my cake looked before I put it in the oven:
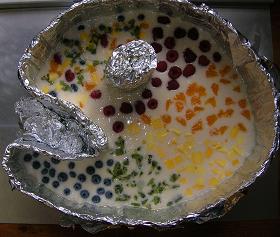
For the chopped fruit in the above recipe, I used raspberries, mandarin oranges, mango, kiwi and blueberries. I thought that I'd put fruit in various cake sections that would correspond to the "paint" on the top of the cake. I also made one section with a combination of all of the fruit - and, guess which section was the most popular? So I might just make the whole cake with the fruit variety next time.
As I mentioned above, this cake is sticky, so it takes some patience. Fortunately, we can just peel off layers slowly and one at a time, rather than crossing our fingers for a flip-of-the-pan. First, cut away any cake batter that leaked through your strip. Then carefully remove the outer strip. You can insert the flat edge of a table knife between the strip and the cake if this helps.
Next, turn your attention to the hole in the center. Cut away the crumpled up foil on top of the rolled sushi-mat segments. (You can use regular scissors. My sister told me that it actually sharpens them.) Then just remove the sushi-mat segments so that you're left with just a partial layer of foil next to the cake.
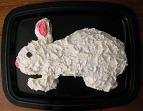
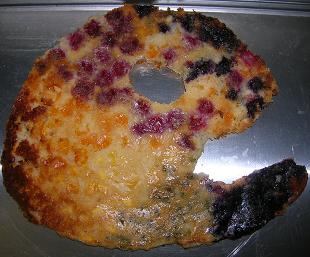
Here comes the trick. Rather than trying to move the cake off the bottom foil layer, put another cookie sheet over the cake, and flip the whole cake over. Now you can carefully peel off the bottom foil layer and the foil remaining in the hole (and its flaps). This is what the flipped cake looks like after the foil's removed. All of the fruit sank to the bottom. Isn't it pretty? Maybe you want to serve it just like this!
But I'll showing you how to ice it. So I washed my first cookie sheet, placed it over the cake, and flipped the cake over again. Now we have a nice, smooth surface to frost.
Apply a thin coat of white icing (a "crumb coat") and let that dry. Meanwhile, take some store-bought or homemade white and chocolate icing, and combine them to make several different shades of brown. The chocolate icing itself can serve as one shade.
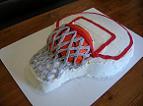
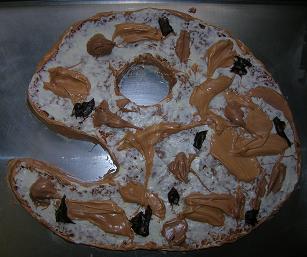
After the crumb coat is dry, frost the sides of your cake with one of the lighter brown icings. Then drop heaping tablespoons of the various brown icings onto your cake. Granted, it looks awful now, but for the purposes of illustration:
Using an icing spatula, smear the brown frostings together. Don't spend too much time smoothing out your frosting. Otherwise, you'll make the frosting a uniform color. The point of having multiple colors is that we're trying to make the cake have a wood-like appearance.
Time for the paint splotches! The easiest way to do this is to use a few tablespoons of various jams (e.g., raspberry, orange, etc.). Alternatively, puree fresh fruit. If the puree is too liquidy (which mine was for the raspberries, oranges, and kiwi), put the purees in saucepans on the stove, add a little sugar, and simmer it (for about 3-5 minutes) until it is thick.
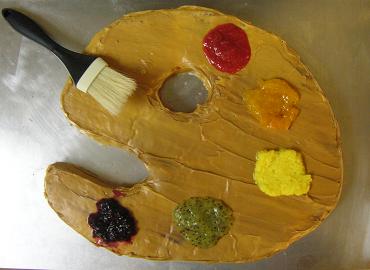
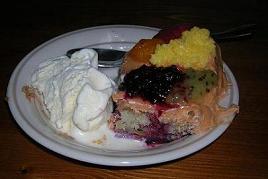
When I served this cake, I put extra fruit toppings on every cake slice. Everyone wanted the fruit variety. This colorful cake, paired with some classic vanilla, made for a great picture. Yum. I wish I had some more left!

|