|
December 1, 2011 - Santa Claus Cake
Click here for short instructions
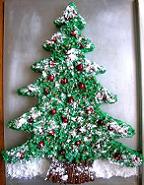
Have I mentioned that I love Christmas? So I just can't help myself from adding some extra cake blogs this month. This week, I'm doing back-to-back blogs about a Christmas-Tree cake and a Santa-Claus cake. (My sister came out last week and helped me churn out both of these.) Click on the Christmas-Tree icon to your right to see the full blog on that cake. But this one will focus on the iconic Christmas celebrity. And in the spirit of the North Pole, did someone say ice-cream cake?
To make this cake, you'll need a Cake-Shaping Strip (look here about how to make one), heavy-duty aluminum foil, a tray or sheet pan, prepared cake batter (see the Ice-Cream Cake Cake recipe below or use about 2 boxes of cake mix), 1 (16-ounce) container of white frosting, 1 (about 16-inch diameter) sheet of fondant, 2-3 tablespoons creamy peanut butter, 1 (4.5-once) ready-to-use red frosting, 1 (3.5-ounce) red sparkle gel, 2 chocolate baking chips, and 1 (7-ounce) can of Reddiwip spray whipped cream.
First, make a Cake-Shaping Strip as described here using six sushi-mat segments. Line a sheet pan with 2 sheets of aluminum foil. (You can use a plastic tray if you're using the ice-cream cake recipe below and not baking the cake.) Shape the strip into a shape of Santa's face and cap. Wrap the bottom foil sheets around the strip, tearing it where needed to wrap it. Push small loosely packed balls of foil along the bottom outer perimeter wherever you think that the batter might leak due (e.g., where you tore the foil). Essentially, just add foil however you need to fully wrap around the bottom of the strip.
Now prepare your cake batter. You can make the batter using about two boxes of cake mix, or you can use the recipe below. It seems appropriate that we add some frozen treats for this holiday, but let me warn you, decorating an ice cream cake takes some patience, due to the need to repeatedly re-freeze it.
Ice Cream Cake
Ingredients:
2 2/3 cups flour
2 2/3 cups light or dark brown sugar
2/3 cup sugar
3/4 teaspoon salt
2 1/2 teaspoons baking powder
1/2 cup applesauce
1/2 cup canola oil
4 eggs
2 (1.5-quart) containers of ice cream, softened
Instructions:
1. Preheat oven to 350 degrees. Spray a 13x9-inch pan with cooking spray.
2. Beat all of the ingredients, except for the ice cream, together.
3. Spread the batter into the prepared pan.
4. Bake for about 45 minutes or until done.
5. Let the baked batter cool. Cut away the stiff borders and crumble the remaining portion of the bars.
6. Press 1/2 of the crumbled bars into a bottom layer in a second pan. Spread a layer of ice cream over the bottom layer. Press the other 1/2 of the crumbled bars onto the ice cream layer. Spread another layer of ice cream over the third layer.
7. Freeze the ice cream cake until it is hardened.
*****
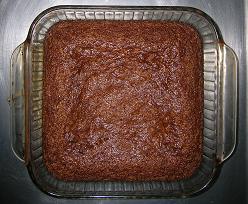
The recipe above is my improved recipe. When I made the cake, I used only half of the bar recipe, and I made the third layer using cookie crumbs. However, the crumbs were a mess. Maybe if I would have added some oil to the crumbs, it would have been better, but I think the best choice would be to just use two cookie-bar layers. The cookie-bar layers are delicious. Here's a picture of the bars (though it's in a smaller pan than I'm recommending that you use):
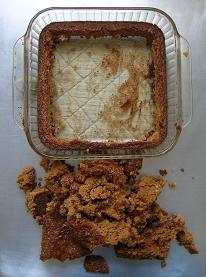
Here's what I mean in the recipe above when I say to cut away the borders and crumble the rest:
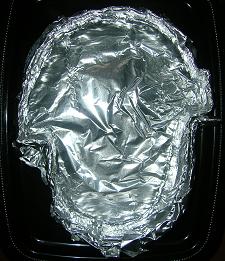
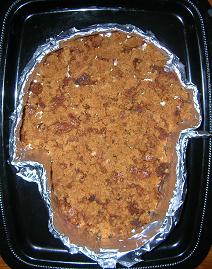
Here's how it looked after I pressed the crumbled bars into a bottom layer in the Santa pan:
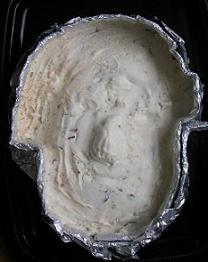
And here's how the whole thing looked after all of the layers were formed. Notice how I added some strategic height variation. Specifically, I formed a taller "nose" shape, and I gradually decreased the height of the cake near the end of the hat portion.
After the layers are formed, freeze the cake until it is completely frozen. Then carefully separate the strip from the cake. Insert a flat end of a table knife between the cake and strip to help the separation if that helps.

I've never decorated an ice-cream cake before, so you might be able to skip a step or two. Nevertheless, the first thing that I did was to cover the cake with a layer of fondant to smooth it out. I used the Easy Marshmallow Fondant recipe that's on our site, which details how to make the fondant and how to apply it to a cake. You can halve the recipe and you don't need to apply a layer of frosting before you turn the fondant onto the cake. Re-freeze your cake after you've applied the fondant until it's completely solid again.
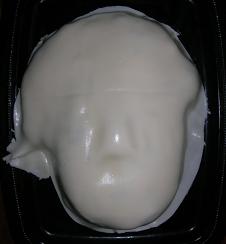
Then, gradually add about 2-3 tablespoons of creamy peanut butter to about 2/3 cup store-bought white frosting. The idea is to make a skin tone, so adjust the amount of peanut butter to your preference. This creates a thicker frosting, so it's easy to really control the frosting. Spread it over the face of the cake, but not over Santa's eyes. You don't need to frost the bottom or sides of the face, as that will be covered by his "beard." Re-freeze your cake until it's completely solid again.
Spread the ready-to-use red frosting over the cap portion of the cake. Re-freeze your cake until it's completely solid again and the red icing has hardened. Then spread the sparkle gel over the red frosting, and place the chocolate baking chips to be Santa's eyes.
Combine about 1/4 cup store-bought white frosting with a little red food dye or a little of the red frosting to form a pink frosting. Spread or pipe the frosting to form Santa's lips. I didn't both using a piping bag and just used an edge of a table knife.
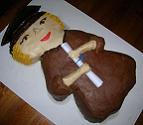
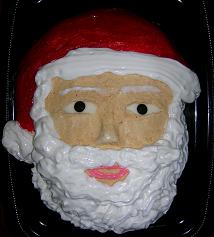
While I didn't do this, you could also pipe a thin chocolate-frosting line along the top of Santa's eyes. It should make them look a little more defined. Here's what Santa looks like so far:

Re-freeze your cake until it's completely solid again and you're ready to serve the cake. This is, by far, the most fun part of the cake: get out the whipped cream. Now have fun, and squirt on his eyebrows, beard and mustache and the rim and top of his hat. Ho, ho, ho!
|